Official Luthiers Forum!
http://www-.luthiersforum.com/forum/

Routing fretboard for inlay
http://www-.luthiersforum.com/forum/viewtopic.php?f=10102&t=6901
Page 1 of 1

Author:  jhowell [ Mon May 29, 2006 4:49 am ]
Post subject: 

Hi--

First, I need to introduce myself. My name is Jim Howell and I live in Ann Arbor, MI. I am a hobbiest and a newbie with my first kit (0-16NY from Blues Creek Guitars) under construction.

I have spent some spare time this weekend putting in a fairly simple fret marker inlay of 'squares and diamonds' from Martin's 1833 shop and now that I have done it I know of some questions to ask!

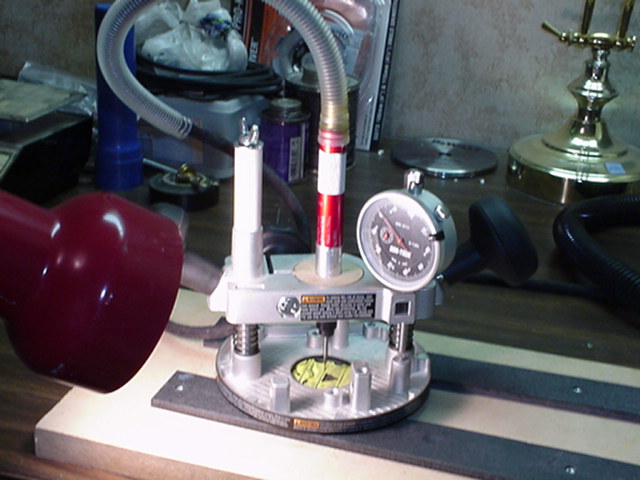
I was using a Dremel 400 and the Stew-Mac 3/64" carbide downcut bit with the Stew-Mac base. I had the speed control set for about 9 out of 10 assuming that high speed is better than low speed for this. Is this a good assumption? The bit was dinky, but seemed under fair control.

Second question concerns handling the fretboard radius. About half way through it dawned on me that I was routing the radius of the fretboard into the bottom of the inlay 'holes' and that the abalone would rocker. Is it considered 'best practice' to use a jig so that the Dremel base runs on a flat surface? Should I be wondering about how to adjust to be tangent to the curve of the fretboard radius for pieces off the centerline of the board or am I thinking too hard?

Many thanks in advance!

--Jim

Author:  tl507362 [ Mon May 29, 2006 6:37 am ]
Post subject: 

Jim,
Welcome to the forum! I'm sure you'll like it here. I've done the diamonds before too. I use a dremel and stew mac base just as you did. However, I did the inlay before I radiused the fretboard. I have done it after too with good luck. You just need to make sure you have enough material that will not sand away. Whether the channel is radiused doesn't really matter. Make sure you routed enough depth to leave it a little proud. I use titebond mixed with ebony(or rosewood)dust to make a very thick colored mixture. I then put it in the hole and press the diamond into the mixture. Do not wipe up the squeeze out. After about 4 hours, you should be able to come back and level it. Good luck, and ask more questions if you did not understand this post.
Tracy

Author:  Joe Beaver [ Mon May 29, 2006 6:38 am ]
Post subject: 

There are some experts on inlay here, but I'm not one of them. Here is my opinion, take it with a grain of salt.

The way I do it is radius the fingerboard first. Then rout the inlays. I follow the curve of the fingerboard, then inlay trying to keep the pearl just proud of the fingerboard. Then sand it flush.

It works quite well. The things you want to avoid are leaving the pearl to high and having to sand it too thin (not so good with ablam) and setting the pearl to deep and ending up with a cupped fingerboard after you sand flush. Wider inlays are usually two or three pieces so if you follow the radius of the board you should stay out of trouble. I could be wrong but it works for me.

Author:  TonyKarol [ Mon May 29, 2006 7:25 am ]
Post subject: 

Unless you have thick, like 60-70 thou shell, I feel its best to route following the radius of the FB. Nothing like doing all that work then sanding thru while putting the radius on - it will be most noticable on the upper frets as well, the depth of the curve is greater there.

Author:  tippie53 [ Mon May 29, 2006 8:27 am ]
Post subject: 

I use a 1/32 bit . Downward bits are like a religion political argument . I am a machinst and will not use them.
The chip is forced DOWN and this often builds up heat and you have more bit failure. I havebeen inlaying a long time and was taught by Dave Nicloles. He has been doing this professionally for 50yrs and he won't use them either.
   I will do inlay on a radiused board. My rig is an air die gringer that runs at 70,000 rpm and can cut like crazy without the runaway a slower tool may do.
have fun and enjoy the hobby. Find what works for you and practice
john hall

Author:  jhowell [ Mon May 29, 2006 9:32 am ]
Post subject: 

Thanks guys. This is an incredibly supportive online community. I'm sure I will have more questions as things progress.

Author:  Andy Zimmerman [ Mon May 29, 2006 9:41 am ]
Post subject: 

Welcome to the forum
Hesh....the bathroom builder is also from Ann Arbor.
Do you too build out of your bathroom!!!!

I do my inlays on a radiused fretboard. I try to get them flush in the center
and bit proud towards the edges. Then I use my radius block to level things
out. I find that the inlays don't really rock much. Also if you use expoy or a
medium thickness superglue, it holds them in place

Welcome to the club
You are going to love it here

Author:  rich altieri [ Mon May 29, 2006 12:37 pm ]
Post subject: 

[QUOTE=tippie53] I use a 1/32 bit . Downward bits are like a religion political argument . I am a machinst and will not use them.
The chip is forced DOWN and this often builds up heat and you have more bit failure. I havebeen inlaying a long time and was taught by Dave Nicloles. He has been doing this professionally for 50yrs and he won't use them either.
   I will do inlay on a radiused board. My rig is an air die gringer that runs at 70,000 rpm and can cut like crazy without the runaway a slower tool may do.
have fun and enjoy the hobby. Find what works for you and practice
john hall
[/QUOTE]

John, if not a downcut bit, what do you use?? Never mentioned??

Author:  rich altieri [ Mon May 29, 2006 12:39 pm ]
Post subject: 

JOhn

Reread the post and see you mentioned 1/32 bit right at the start. Where do you buy these and are they just straight bits or upcut ??

Author:  SniderMike [ Mon May 29, 2006 12:46 pm ]
Post subject: 

[QUOTE=rich altieri]
John, if not a downcut bit, what do you use?? Never mentioned??[/QUOTE]

upcut seriously

Also, I personally like to use dyed epoxy with my inlays. That would fill in any gaps caused by a "radiused" cavity too. I usually use 5 minute epoxy and use TransTint dye. There's many different colors. I crank the dremel up as high as it will go too.

Mike


Author:  SniderMike [ Mon May 29, 2006 12:48 pm ]
Post subject: 

Oh yes, and welcome, Jim!

Mike

Author:  Serge Poirier [ Mon May 29, 2006 1:47 pm ]
Post subject: 

Jim, welcome to the OLF, all great people here to help you out, answer all your questions, support you in sickness and in health and most important thing to remember in here:WE WANT PICS!!!!!

Glad to have you with us!

Serge

Author:  Michael Dale Payne [ Tue May 30, 2006 8:47 am ]
Post subject: 

Jim,
Before I started making my own fretboards and was using pre radiused, I would use some rails on both sides of the fretboard (wood or aluminum) taller than the fretboard. The router base will ride on the rails there by providing a flat bottomed channel. The width of a diamond or square position marker even at 19mm wide is so little variance over a 16" radius that if you inlay a .06 or .05 thich inlay .01 shallow that there will be plenty left after sanding so that is not a big worry.

I channel then add a drop of titebind to the back of the marker just to old it down in the channel. Then I dry pack ebony end grain dust or rosewood end grain dust in to the seams then saturate with thin CA. The CA will prppergate through the dust and bind to both the inlay and the fretboard. Then radius sand level with the fretboard. I like to pack the dust blow off access then pack again till the dust is packed tight and level.

Also the CA or any other adhisve will darken the dust so on rosewood I add about 40% spruce dust to the rosewood dust and mix well. This help keep the dust fill from being noticably darker.MichaelP38867.7491666667

Author:  jhowell [ Tue May 30, 2006 12:48 pm ]
Post subject: 

Thanks again for the info and the warm welcome! My wife and I live in an apartment complex and my shop, such as it currently is, is a corner of the guest bedroom. Hesh may indeed have me beat in square feet.

Author:  1bordeaux [ Wed May 31, 2006 6:52 am ]
Post subject: 

Hi Jim,
Welcome!
I agree with all the above and wish to add to it.

If your inlays are small, separate pieces, it's usually OK to route using an outside rail set up. An example would be a Martin style "diamonds & snowflakes" inlay, or even simple dots. The only issue with this set-up is having to change cutter depth if you move to the outside of the fingerboard on certain pieces.

A good place to route on the radius would be when you have large flowing pieces joined together with others,(A familiar example would be a Martin "tree of life").
This method helps you retain most of the color and character of the shell as seen prior to being inlaid and becomes more important as the radius of the board decreases,(Fender electric neck vs. Gibson style).
I use both methods most daily with good results.

If ever in doubt, we have quite an extensive network and many years experience here at the OLF.
Best of Luck!

Author:  buddy lee [ Thu Jun 01, 2006 6:11 pm ]
Post subject: 

Jim, I use a rail setup made of a piece of mdf and some 1/4" thick plastic that was laying around. The fretboard wedges in nice and tight and stays flat while routing. I've done it the other way also, routing directly on the radiused fretboard, but it was harder to get a good fit for the inlay pieces.

I got my first 1/32 upcut spiral carbide bits from Dave Nichols, and since then have bought some USA-made Atrax brand stub end mills from industrial supplier Enco. They usually have them on sale at around $5 each.

Here's a pic of my router setup-with a short chunk of practice fretboard underneath. It's made from a Dremel Advantage cutout tool plunge base that I modified to hold a pencil grinder and a dial indicator. The indicator makes it very easy to adjust for the correct depth of cut, as not all your inlay pieces will be the same thickness. Best of all it doesn't cost much to throw one together- I spent $30 total to make this, because the plunge base was on sale at Big Lots really cheap and Harbor Freight has the other stuff on sale. It may look big and awkward, but I found it easier to use than the smaller bases. Visibility of the cutting area is good but getting lots of bright light down at the bit is important.

You're right about using the highest RPM setting on the Dremel, you'll get a smoother and more controllable cut that way. buddy lee38870.1428587963

Author:  CarltonM [ Fri Jun 02, 2006 5:27 am ]
Post subject: 

Buddy, I really like that jig. If your board is already radiused, no problem as long as it's not over 1/4" thick. If it's more than 1/4" thick, you could use the jig and a bigger router to thickness it exactly! You could also make one rail adjustable to accomodate any fingerboard taper. Cool!

Author:  tippie53 [ Sat Jun 03, 2006 9:44 am ]
Post subject: 

I get my bits from Dave Nichols. They are solid carbide and cut well. They are designed for high speed cutting.
   With the higer speed they are smooth and last a long time.
john hall

Page 1 of 1 All times are UTC - 5 hours
Powered by phpBB® Forum Software © phpBB Group
http://www.phpbb.com/